In this tutorial, We are going to cover step by step installation of Mininet Software. Mininet is an emulator used for OpenFlow & Software Defined Networking experiments. First of all install any version of ubuntu linux. In our case, we are using Ubuntu 14.04 server edition for installing Mininet.
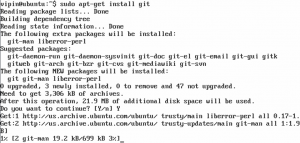
Step 1: First of all we have to download mininet software from github.com by using “git” utility. When we run the “git” command, it gives the error that “command not found”. So we need to install “git”. Use “sudo apt-get install git” to install git.

Step 2: Screenshot of git installation.

Step 3: Now run the command “git clone” to download the mininet source code from “github.com” site.

Step 4: We have successfully downloaded the source code. Move to mininet directory. Check the different branches of mininet available by running “git tag” command.
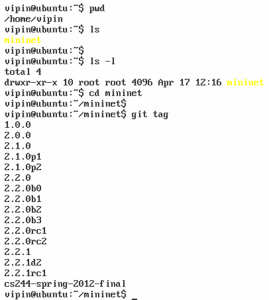
Step 5: Since we want to use the latest branch which is “2.2.1” at the time of writing this tutorial. Use the “git checkout -b” to move to “2.2.1” branch. Do not forget to use “sudo” otherwise you will get permission denied errors. We also need other software like Pox Controller, OpenVswitch, Wireshark for setting up proper SDN labs. So use the script “install.sh” with “-a” option to install everything required. Run the script as shown in screenshot.

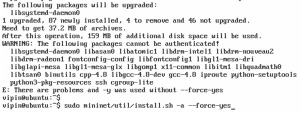
Step 6: Screetshot of installation process. Installation will take 5-20 minutes depending upon internet speed.

Step 7: In some cases, It might gives errors. In that case try to use “–force-yes” switch. If still you are not successful in installation, then use “-y” & “–force-yes” as shown in screenshots. In the end, it will show install successful message.
![]()
Step 8: To verify the installation, just run “mn” command. It will set up a lab of minimal topology having 2 hosts “h1”, “h2”, one switch “s1” & will start the reference controller. Check the connectivity between hosts “h1” & “h2” by using “pingall” command. As can be seen, we are successful in running mininet.

Step 9: Also check whether Pox is running properly or not by using the command as shown in screenshot. You have to run this command from “pox” directory inside your home directory. In our case, Pox is working properly.
