In this tutorial, We are going to cover step by step installation of VMPlayer Virtualization Software.
Step 1: Download the software “vmplayer” from www.vmware.com site. Save it into some folder. Double click on the downloaded software. It will display the following screen.
Step 2: It has started installing VMware Player.

Step 3: Click on next.

Step 4: Accept the Licence Agreement & click next.

Step 5: Click on Next. At this point of time, you can change your installation directory. But we are installing in default directory.

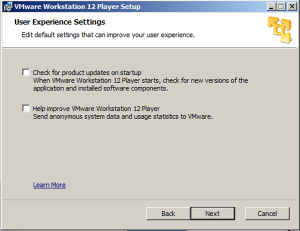
Step 6: Unselect product updates & help checkbox buttons.
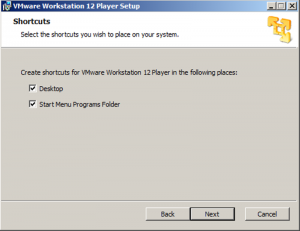
Step 7: Select “Desktop” & “Start Menu” checkboxes & Click on Next.
Step 8: Click on Install button.

Step 9: It will take some time. This screen is showing the progress of installation.

Step 10: Installation completed. Click on finish.

Step 11: select the radio button “free for non-commercial use”. Click on continue.

Step 12: Click on finish to complete the installation.

Step 13: Click on VMPlayer icon on the desktop to start the software.

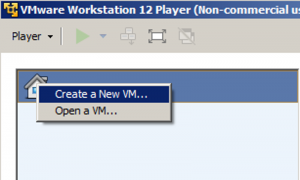
Step 14: Right click on home button. It will display menu. Select “Create a New VM”